Introduction
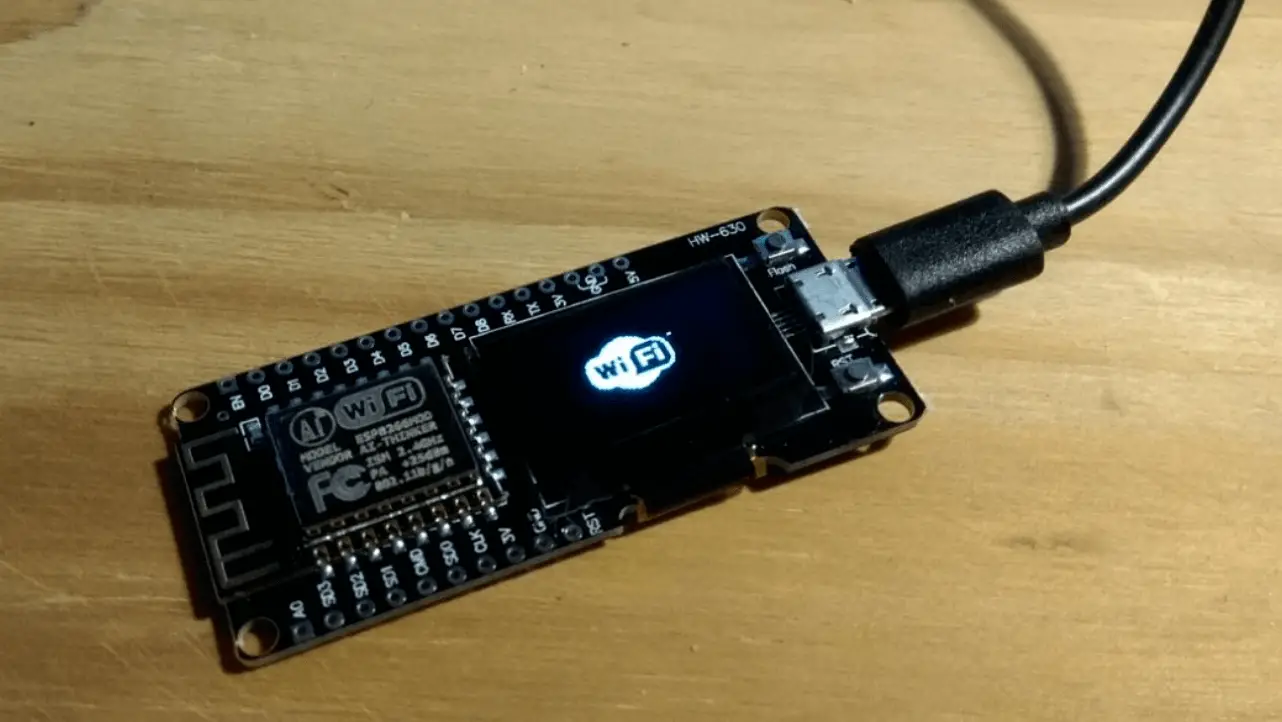
In this tutorial we are going to use the NodeMCU CP2102 ESP8266 ESP-12F. We are going to explain how to compile and upload code for this particular model. If you hace NodeMCU without lcd buildint you can conect the lcd module using the pins on the board (see appendix).

Step 1: Download arduino IDE
We need to download arduino IDE to compile and upload the software to the Node MCU.
Step 2: Install ESP8266 board and libraries
Open you Arduino IDE and follow this steps:
- Start Arduino and open Preferences window.
- Enter
http://arduino.esp8266.com/stable/package_esp8266com_index.jsoninto Additional Board Manager URLs field. You can add multiple URLs, separating them with commas. - Open Boards Manager from Tools > Board menu and find esp8266 platform.
- Select the version you need from a drop-down box.
- Click install button.
When you installed the board manager, you need to select it doing the following:
- Tools > Board menu after installation.
Step 3: Install ftdichip drivers to connect to Node MCU
To get your board recognized by your OS tou need to download the Virtual COM port (VCP). For OSX you need to allow the drivers on the "Security & Privacy".
Step 4: Install esp8266-oled-ssd1306 library to use the lcd module
In order to use the ESP8266 with the lcd module go to:
- Sketch > Include Library > Manage Libraries.
Search for esp8266-oled-ssd1306 library and install ir.root
Step 5: Upload WiFi monitor project
We are ready to use out Node MCU, you can choose any project you want. To use the WiFI and the LCD module we choose PacketMonitor. Open the project file esp8266_packet_monitor.ino from the repository and click on the "play" button.
Download the code with:
git clone https://github.com/spacehuhn/PacketMonitor.git
Appendix
LCD module pinout for NodeMCU ESP8266 without lcd integrated
| Display | ESP8266 |
|---|---|
| GND GND | GND |
| VCC 3.3V | 3.3V |
| SDA GPIO 5 (D1) | GPIO 5 (D1) |
| SCL GPIO 4 (D2) | GPIO 4 (D2) |
OSX error with NodeMCU: Kext with invalid signature
If you get the error below, make sure you installed the latest version and you accepted the driver at the "Security & Privacy".
/Library/StagedExtensions/Library/Extensions/11A63441-35F4-4BB6-8805-14B51E559EF0.kext does not appear in strict exception list for architecture: x86_64
Untrusted kexts are not allowed
Kext with invalid signature (-67007) denied: /Library/StagedExtensions/Library/Extensions/11A63441-35F4-4BB6-8805-14B51E559EF0.kext
Bundle (/Library/Extensions/NIUSBGuitarRigMobile.kext) failed to validate, deleting: /Library/StagedExtensions/Library/Extensions/11A63441-35F4-4BB6-8805-14B51E559EF0.kext
Unable to stage kext (/Library/Extensions/NIUSBGuitarRigMobile.kext) to secure location.
/Library/StagedExtensions/Library/Extensions/256BAEC5-4A5A-4095-AE17-D921AEA3DD8B.kext does not appear in strict exception list for architecture: x86_64
Untrusted kexts are not allowed
Kext with invalid signature (-67007) denied: /Library/StagedExtensions/Library/Extensions/256BAEC5-4A5A-4095-AE17-D921AEA3DD8B.kext
Bundle (/Library/Extensions/NIUSBAudioDriver.kext) failed to validate, deleting: /Library/StagedExtensions/Library/Extensions/256BAEC5-4A5A-4095-AE17-D921AEA3DD8B.kext
Unable to stage kext (/Library/Extensions/NIUSBAudioDriver.kext) to secure location.
Kext rejected due to system policy: <OSKext 0x7f8f71c67050 [0x7fff962c9980]> { URL = "file:///Library/StagedExtensions/Library/Extensions/SiLabsUSBDriver.kext/", ID = "com.silabs.driver.CP210xVCPDriver" }
Kext rejected due to system policy: <OSKext 0x7f8f71c67050 [0x7fff962c9980]> { URL = "file:///Library/StagedExtensions/Library/Extensions/SiLabsUSBDriver.kext/", ID = "com.silabs.driver.CP210xVCPDriver" }
Diagnostics for /Library/Extensions/SiLabsUSBDriver.kext: